选择项部的面,挤出200,如图,注意顶部的顶点位置。

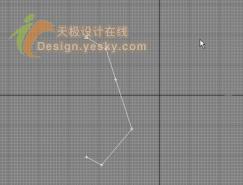
在中部,快速节片后,调节点如图。

切割出如图线段。。

调节出刃口。

将前面建的物体网格平滑,数量为一!完成后,与后面的物体成组,镜面复制。最后创建几个胶囊状物体做为剪子的转轴!这些都是很简单的东西,也就不罗嗦了~完成后如图。


投放一个简单的不锈钢材质后,效果如图。
渲染大家就自己去搞了,我就不废话了。

最终完成效果。

标签:建模实例教程

选择项部的面,挤出200,如图,注意顶部的顶点位置。
在中部,快速节片后,调节点如图。
切割出如图线段。。
调节出刃口。
将前面建的物体网格平滑,数量为一!完成后,与后面的物体成组,镜面复制。最后创建几个胶囊状物体做为剪子的转轴!这些都是很简单的东西,也就不罗嗦了~完成后如图。
投放一个简单的不锈钢材质后,效果如图。
渲染大家就自己去搞了,我就不废话了。
最终完成效果。